Thursday, July 7, 2016

Opening 4K GoPro video into Premiere Pro CC/CS6/CS5

Summary: Go out there and capture something to your GoPro footage, Pay attention to your camer’s settings in order into Premiere Pro CC/CS6/CS5 editting. 


Here are some things to consider: Look at the camera resolution. Standard 1080p HD video is 1920 x 1080 pixels. The 4K or 2.7K video settings are both higher resolutions than the 1080p setting, so you can safely crop or scale those videos down to 1080p without losing image quality. On the other hand, 720p or WVGA settings are smaller than standard 1080p HD video, so if you want to achieve 1080p, you need to scale your video upward, which may make your video appear not as sharp. 

Think about the video frame rate. It controls how many video frames are captured or played over time. The higher the frame rate, the smoother the video will appear during playback. The lower the frame rate, the choppier the video will appear — in such cases, it may appear to stutter. Very high frame rates are great for slowing down a scene to achieve a slow-motion effect. Slowing down a high frame rate can produce very smooth and realistic output. Slowing down a low frame rate, however, causes even more stuttering and jerky movement, and generally doesn’t lend itself to high-quality output. In my own work, I prefer to shoot at either 1080p at 60 fps, or 2.7K at 30 fps, depending on how much action there will be in the shot. 

 Premiere Pro supported  audio files formats


Formats Details
AAC
AC3 including 5.1 surround
AIFF/AIF
ASND Adobe Sound Document
AVI video for Windows
BEF Broadcast WAVE format
M4A MPEG-4 Audio
MP3 mp3 Audio
MPEG/MPG MPEG Movies
MOV QuickTime, requires QuickTime Player
MXF Media exchange formats
MXF is a container formats that supports:
1: P2 movies: Panasonic Op-Atom variant of MXF, with video on DV,
DVCPRO, DVCPRO 50, DVCPRO HD, AVC-intra
2: XDCAM HD Movies
3: Sony XDCAM HD 50(4:2:2)
4: Avid MAF Movies
WMA Windows Media Audio, Windows only
WAV Windows Waveform

 Premiere Pro supported video files formats

Formats Details
AAF Advanced Authoring Formats
AEP, AEPX After Effecs project
CSV, PBL, TXT, TAB batch list
EDL CMX36003 EDLs
PLB Adobe Premiere 6X bin (windows only)
PREL Adobe Premiere Element Projects (Windows only)
PRPROJ Premiere Pro project
PSQ Adobe Premiere 6X storyboard(Windows only)
XML FCP XML


To transcode GoPro footage for editing in Premiere, you're highly recommended to use Pavtube Video Converter Ultimate. By running it, there's no need to set the codec by yourself: the Mac program has a optimized preset (MPEG-2) for Adobe Premiere Pro (Premiere Pro CC included). Besides Premiere, this program can also export DNxHD for Avid, Apple ProRes for Final Cut Pro, Apple InterMediate Codec for iMovie and more NLE systems for editing. If you're running a Windows PC, please turn to Video Converter, which supports converting GoPro MP4 to Premiere supported file format in Mac (El Capitan included). Just get the right program according to your system and follow the steps below to learn how to get GoPro 4K/2.7K or HD footage support in Adobe Premiere Pro CC/CS6/CS5. 

Free download and install 


Other Download: 
- Pavtube old official address: http://www.pavtube.cn/blu-ray-video-converter-ultimate/ 
- Cnet Download: http://download.cnet.com/Pavtube-Video-Converter-Ultimate/3000-2194_4-75938564.html 

The steps of 4K GoPro video into Premiere Pro CC/CS6/CS5 


Step 1. Creat a folder for saving GoPro 4K videos 

Launch the best Gopro video converter on PC. Create a folder with the original GoPro video on your hard drive. 


Step 2. Load Gopro 4K videos 

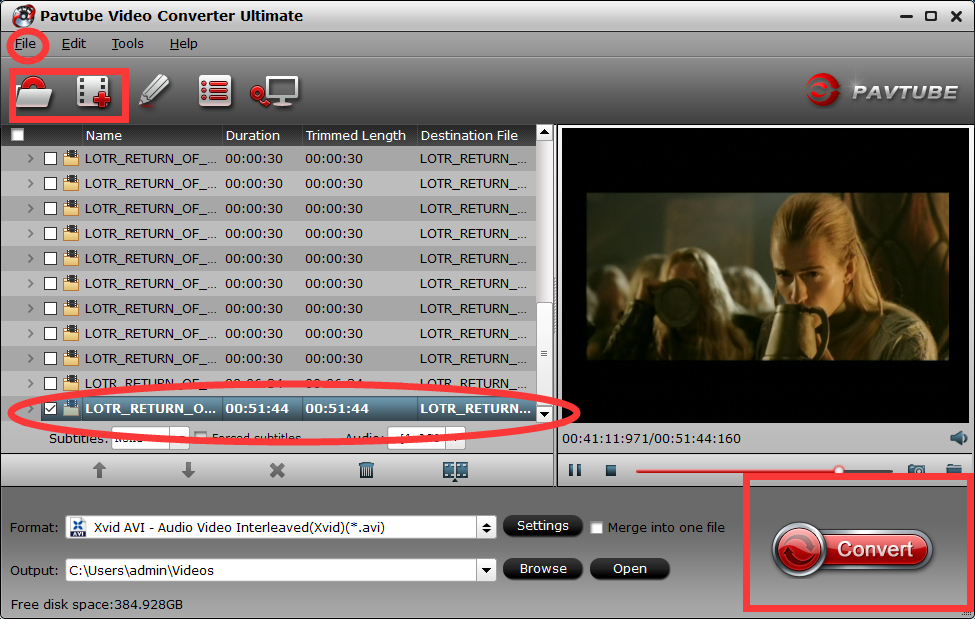
Choose all the GoPro videos in your folder, drag & drop or through File > “Add Video/Audio” button/”Add from folder” button to import source GoPro 4k videos into the Pavtub Video Converter. Click “Format” pull down list to select “Adobe Premiere/Sony Vegas> MPEG-2(*.mpg)” as the best video format for Adobe Premiere Pro CC/CS6/CS5. Another two specialized formats “WMC (VC-1) (*.wmv) and “MOV (AVC) (*.mov)”are the good choice as well. 


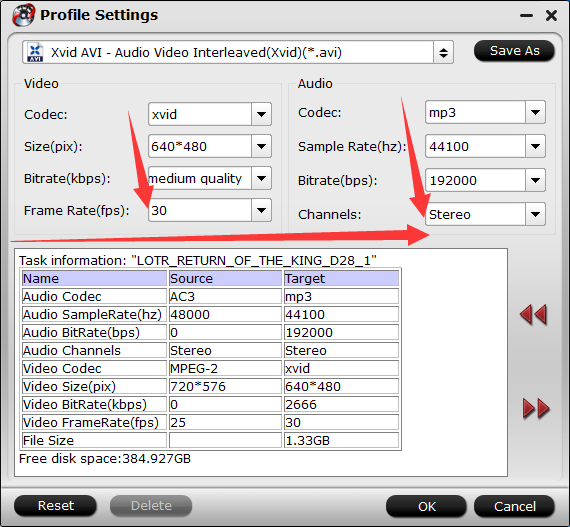
Step 3. Set Advance Settings (Optional) 

If you want to customize video and audio encoding settings to get the best quality you want, just click the “Settings” button to customize the output video/audio resolution, frame rate, bit rate, etc. 


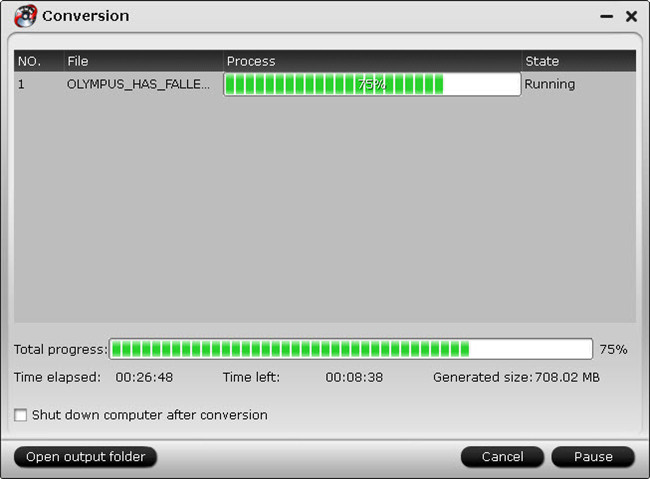
Step 4. Start converting GoPro 4K videos to Premiere Pro 

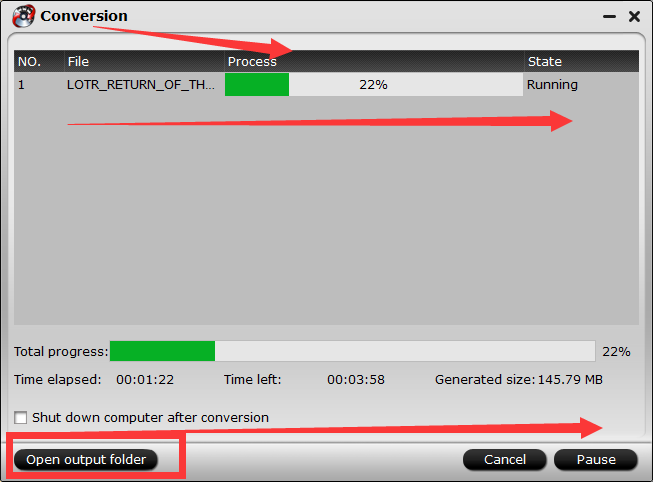
Click “Convert” button to start transcoding Gopro videos to MPG/MOV/WMV for Adobe Premiere Pro. When the conversion task is finished, you can get the exported files by click the “Open” button for importing to Adobe Premiere Pro CC/CS6/CS5 to do further editing 


Related Software

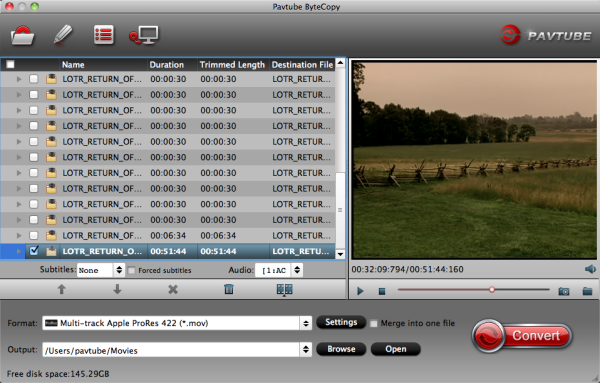
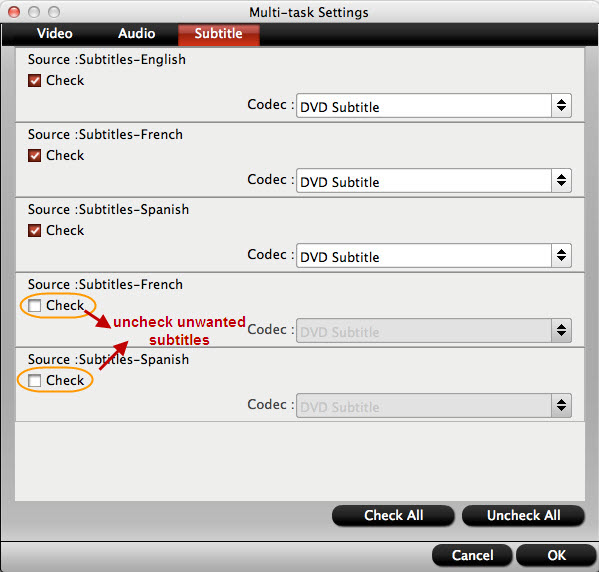
Pavtube ByteCopy : the best Blu-ray/DVD to Lossless MKV solution, is a powerful program with the ability of backing up Blu-ray/DVD collection to multi-track MKV without quality loss, ripping BD/DVD movies to MP4 and MOV with multiple audio streams, and converting BD/DVD from hard discs to virtually any popular video and audio format so that you can freely watch movies on Apple iOS devices, Android OS devices, Windows RT/Pro devices, HDTV, 3D TVs, PSP, PS4, PS3, Plex, WDTV Live, Roku 3 and more devices. In recent update, ByteCopy can support ripping Blu-ray/DVD movie to H.265/HEVC MP4 with better video quality compared to H.264 MP4 in same profile presets. At the meantime, this multi-track Blu-ray/DVD converter can be considered as a user-friendly movie editing tool with the professional functions to trim, crop, merge, insert subtitles, export srt/ass/ssa subtitles, add video effects in the destination movie.

Pavtube BDMagic : convert 2D Blu-ray, 3D Blu-ray and standard DVD to SD, High-Definition formats or even create 3D videos with excellent video/audio quality in fast conversion speed. This BD/DVD to video workaround could output various video and audio formats, like H.265/HEVC, MKV, MP4, MOV, DivX, AVI, MP3, FLAC, etc so you can make a duplicate copy for your video collection, or share movies on numbers of popular media players,like Apple media devices, Android smartphones and tablets, Windows media players, various smartphones and more. Besides, you can easily customize Blu-ray DVD collection to export desired movies in your own patent.

Pavtube DVDAid : provides the best solution to rip DVD and convert DVD to video and audio in popular file formats for many devices. Along with multiple practical bonus features like video editor, DVDAid is capable of improving your DVD movie experience without location or time limitations. It could backup DVD and convert DVD to various video and audio formats including MP4, MKV, MOV, AVI, WMV, MP3, AAC, etc to let you enjoy DVD movies on any mobile device like iPhone 6, iPhone 6 Plus, iPad Air 2, iPad Mini 3, Galaxy S6, Galaxy S6 Edge, Kindle Fire HDX, PS3, PSP, Surface, and more. Surprisingly it adds H.265/HEVC as output video format in order to satisfy users who ask for high video quality.

Related Source :


MOV to Premiere Pro : Load MOV Files to Premiere Pro CC/CS6/CS5 for Editing

Subtitle to Premiere Pro : Premiere Provideo and audio, and subtitle

M2TS to Premiere Pro : Convert M2TS for edit in Adobe Premiere Pro

Media to Premiere Pro : How to import Media Files to Premiere Pro on Mac

MP4 to Premiere Pro : Unable to Import MP4 into Premiere Pro CC on PC?

P2 MXF to Premiere Pro: Solution to edit P2 MXF in Adobe Premiere Pro CC

2016 Top Best Blu-ray Ripper for Mac El Capitan Reviews

Blu-ray discs provide you high-definition and high-capacity discs deliver a truly cinematic and immersive experience. Unfortunately, not all players are capable of displaying Blu-ray’s goodness. You may be able to watch these discs on your HDTV, but try to put them into the DVD player in another room and you’re out of luck. So this is where there’s a need there will always be a host of products looking to fill it, and Blu-ray conversion software is certainly no exception. 

According to my test results and customers’ comments, I’ve summarized 5 of them which seem powerful and useful by comparison, and hope you can get one to fit your needs. Just hold on reading. 

Top 5 Blu-ray Ripper for Mac programs Reviews 2016 

Top 1. Pavtube ByteCopy for Mac – Excellent 

Price: $33.6 
 
The good: When it comes to ripping Blu-ray discs and DVDs with multi-tracks, Pavtube ByteCopy for Mac is top one on the market. Pavtube ByteCopy for Mac not noly well deserves its high reputation in bd/dvd decryption, intuitive interface, the ready-made profile, high quality and fast speed, but also perfectly perform recoding files from Blu-ray discs an standard DVDs into MKV/MP4/MOV/M4V video with certain video/audio codecs. If you want to rip a Blu-ray/DVD to MKV on Mac with multi audio tracks, subtitles, and chapter markers without quality loss, Pavtube ByteCopy for Mac would be your choice. 

The bad: A little more expensive but I think it is worthy of that! And I’m glad to see it has many specials recently. 

The bottom line: Backup BD/DVD to MKV without quality loss. Allow full preservation of all audio tracks, subtitles and chapter markers. Remove unwanted subs streams and audio tracks at will. Resumed subtitle output feature to Format menu to directly output *.srt subtitle. 

Editors’ note: ByteCopy for Mac is intuitive and simple. The encoding to .mkv happens fast and the result is perfect. 

Top 2. Pavtube BDMagic for Mac – Good 


Price: $34.3 

 
The good: You can import all kinds of Blu-ray and DVD sources: BDMV folder, physical DVD, Blu-ray ISO, VIDEO_TS folder, DVD ISO and IFO file, protected Blu-ray Disc and unprotected Blu-ray Disc. Using the “Full Disc Copy” feature, you can preserve the Blu-ray’s original file structure, buakup Blu-ray disc to PC with one click. Using “Directly Copy” feature, you can backup Blu-ray/DVD main movie in original format(m2ts or vob) on Mac without quality loss. 

Pavtube BDMagic for Mac, the Best Blu-ray Ripper for Mac OS X 10.9 Mavericks software which makes blu-ray backup a matter of capturing a disc image and saving it on your hard drive. It has various profiles and formats, e.g. most mainstream output video formats like AVI, MP4, and WMV are all included in the format lists. Moreover, Pavtube programs support adding *.srt and *.ass subtitles into video and merge into one file for output. 

Whether you prefer to back up your blu-ray collection with physical copies or with compatible formats for various devices, it leaves the choice up to you. 

What’ more:

  • Added 3D profiles in Format menu. (Side-by-Side, Top-Bottom, or Anaglyph 3D in MKV/MP4/MOV/WMV/AVI)
  • Perfectly compatible with Mac OS X 10.9 Mavericks and 10.10 Yosemite


The bad: It lets you trim a specific duration from a movie, but not allows you to split movie/divide a movie evenly into multiple segments. 

The bottom line: With decent decrypting capability, high quality video output and considerate backup solution and specific format templates for versatile PMP devices, Pavtube BDMagic for Mac ranks top on the Mac Blu-ray ripping application list. 

Editors’ note: Pavtube provides excellent customer support service, including lifetime free upgrade of product and technical support. Users can contact the support staff via email for help and suggestion. 

Top 3. Leawo Blu-ray Ripper for Mac – Good 

Price: $44.95 
 

The good: Leawo Blu-ray Ripper for Mac comes with the popular feature to convert 2D to 3D. It can load multiple Blu-ray and DVD movies at a time. Leawo Blu-ray Ripper for Mac has stunning trim and crop feature- it trims movie more accurate and crops video more considerate than its competitors. If you have tons of movies waiting to rip and feel like having a Blu-ray Ripper queue them several movies for running overnight, Leawo is recommended. 

The bad: Not recognizing Blu-ray ISO or forced subtitle (if there is). There’s no backup option for keeping original movie quality. 

The bottom line: Leawo Blu-ray Ripper for Mac is a nice tool for DVD and Blu-ray ripping. 

Editors’ note: We noticed that audio quality is noticeably degraded when ripping Blu-ray with Leawo Blu-ray Ripper for Mac. 

Top 4. Xilisoft Blu-ray Ripper for Mac – Poor 


Price: $49.95 

The good: Xilisoft Blu-ray Ripper for Mac can convert both standard Blu-ray videos and 3D Blu-ray videos to SD and HD video formats such as MKV, AVI, WMV, TS, etc. And it can preserve 3D effects when your source is 3D Blu-ray movie. 

The bad: The app does not decrypt Blu-ray protections and requires AnyDVD HD to be installed in advance for Blu-ray ripping. DVD ripping is not supported. 

The bottom line: Xilisoft Blu-ray Ripper for Mac does not rip movies from Blu-ray Disc, but if you have had the Blu-ray cracked and saved onto computer hard drive, this tool would be helpful and useful for you to enjoy movies on iPod, iPhone, Apple TV, PSP, Xbox, Zune, NDS, Wii, and 3D smartphones. 

Editors’ note: This tool is not recommended unless when you want to convert 3D Blu-ray and keep 3D effect. 

Top 5Aiseesoft Blu-ray Ripper for Mac – Fair 

Price: 

Platinum version: $48.75 
Standard version: $36.75 


The good: When it comes to decrypting/hacking Blu-ray discs and DVDs, Aiseesoft is about as good as it gets. Aiseesoft Blu-ray Ripper for Mac well deserves its high reputation in decryption, and it handles not only AACS, BD+, Region code restriction, but also Cinavia protected Blu-rays. If you want to rip a Blu-ray to MKV and keep 2 audio language and external subtitles, Aiseesoft would be your choice. 

The bad: It is lacking of DVD ripping feature. The interface is not very intuitive. And Aiseesoft Blu-ray Ripper for Mac costs more than its alternatives. 

The bottom line: Aiseesoft Blu-ray Ripper for Mac decrypts and rips Blu-ray title to various video files playable on next generation consoles. 

In Conclusion: 

Pavtube ByteCopy for Mac/BDMagic for Mac is proved to be the best Mac Blu-ray ripper for Mac. It ranks top on the Blu-ray ripping application list for almost every aspect except for interface design. 

Anyhow, hope this top Mac Blu-ray Ripper Reviews can help you fast choose an easy-to-use and yet professional Mac Blu-ray ripping tool. Now get the best Blu-ray Ripper for Mac Program for You! 

P.S. 

1. If you only need to deal with DVD disc, try Pavtube DVDAid for Mac ($28)- 20% off on sale now. 

2. If you need an all-inclusive multimedia toolbox which integrates all the features of a blu-ray ripper, a dvd ripper and a video converter, get Pavtube iMedia Converter for Mac ($52) – 20% Off now. 

Big news! To celebrate the 2014 Thanksgiving Day, Pavtube studio hold the biggest promotion you have never met here. You can enjoy the big discount before December 10th, you will not miss it! 

Pavtube Blu-ray Ripper Upgrade to 4.8.6.7 Version

Hot news for Blu-ray collectors!! Are you still upset that you can't rip your new bought Spectre 007, The Martian,The Revenant cause these new Blu-rays now have been encrypted with more complex encryption mechanism MKB61 Now, you are saved by Pavtube in that Pavtube Studio has upgraded his main 3 Blu-ray ripping tools to 4.8.6.7 version to support the new Blu-ray MKB61.


Usually, you perhaps know that Blu-ray is protected by AACS, BD+,UOP,DRM, HDCP, BD-ROM, Region codes, etc. This encryption prevents people from copying, ripping and converting their legally bought Blu-rays even they just rip it for personal use. Normal Blu-ray ripping applications on the market can rip AACS, BD+ schedule but no other difficult encryption mechanism. Even powerful as MakeMKV, supports only Blu-ray encryption up to v60, not including MKB61.
This time, Pavtube upgraded his three top-ranked Blu-ray Ripper BDMagic, ByteCopy, Video Converter Ultimate to the newest 4.8.6.7 version supporting to decrypt new Blu-ray encrypted with AACS, BD+,Region codes, HDCP up to MKB61.Now, let's learn the upgrade and the main features of each Blu-ray ripping tool.

What's new ?

1.support latest Blu-ray MKB61.
2.fix some bugs.

Key features of ByteCopy

- 1:1 backup BD/DVD with original video structure.
- Main title copy BD/DVD with smaller size.
- Copy BD/DVD to MKV with lossless quality.
- Convert BD/DVD to MP4/MOV/AVI with multiple subtitle/audio streaming.
More functions of ByteCopy is in the review.

Key features of BDMagic

- Full copy and directly copy Blu-ray and DVD
- Convert Blu-ray/DVD to SD/HD MP4, MKV, AVI, etc to NASExternal Hard DriveMedia Server, etc.
- Convert 4K Blu-ray to H.265/HEVC 4K MP4/MKV
- Rip Blu-ray preserving AC3, AAC, DTS audio in stereo, 5.1, 7.1 sound.
More functions of BDMagic is in the review.

Key features of Video Converter Ultimate

- Decrypt Blu-ray and DVD to virtually any SD/HD video
- Convert 4K Blu-ray to SD/HD MP4, WMV, MOV, QuickTime, ProRes for editing in NLE.
- Copy Blu-ray/DVD to M3U8 for HTTP live streaming
- Convert, shrink, compress Blu-ray, DVD to YouTube, FaceBook, Vimeo, Instagram, Google Plus, etc.
More functions of Video Converter Ultimate is in the review.

The Blu-rays you can Decrypt:

You can use Pavtube Blu-ray Ripper to decrypt some new released Blu-ray including: The RevenantThe MartianHannibal TV Series, Game of Throne (1-6), Spectre 007Zootopia, Harry Potter, Independence Day, The Divergent Series: AllegiantThe WalkAvatarHouse of Cards, Bridge of Spies, Mad Max: Fury Road, Room, Spotlight, X-Men: Apocalypse, The Family Fang, Ben Hur, Roots, Code of Honor, Now You See, Finding Dory, Arch Angels, Shchedrin: The Secret Life of Pets, Sherlock, Ghost Rider / Hellboy, The Da Vinci Code, Pete's Dragon, Ice Age: Strong and Proud, Star Wars: The Force AwakensLondon Has FallenFifty Shades of Grey, Kingsman-The Secret Service, etc.
What's more, Pavtube Studio is holding on Summer Vacation Promotion. Buy Blu-ray Ripper in this period, you may get some surprise:
In addition, Pavtube Studio also upgraded his Video DVD Converter Ultimate to support users to rip any new released commercial DVD discs to MP4, MOV, MKV, 3GP for using on iPad Pro, iPhone 6S, Galaxy S7/S7 Edge, HTC 10, Nexus 6p, Xperia Z6, etc.

Monday, July 4, 2016

ZTE VR review: Backup blu-ray videos to watching on ZTE VR

Summary: Alongside the announcement of its new Axon 7 smartphone today, ZTE also unveiled the creatively named ZTE VR. It's basically ZTE's version of the VR: it's a mostly empty headset that you slide the Axon 7 into. 


The ZTE Axon 7, just announced today, boasts quite a serious flagship-grade specs sheet. And if you are aiming for the top, you better go all out, a lesson the Chinese OEM seems to be putting into practice with the ZTE VR.Details about the virtual reality headset are still mostly unavailable, but going by the official render ZTE has provided, there isn't really much room for surprises. It looks to be ZTE's take on the Samsung Gear VR - more or less a holder to place the Axon 7 a few inches away from your face and let it do most of the heavy lifting.

Just like the Samsung Gear VR, there are a few controls on the side - a rocker, single action button and a touch pad to swipe and navigate around. There is also a focus wheel on the top. ZTE has also shared that the unit has a 9-axis gyroscope inside to aid in motion tracking - neat!

The only other thing that was mentioned for the ZTE VR is that it will support Android's Daydream VR, which was introduced at Google I/O 2016. However, that might prove to be a bit of a cryptic statement, as the particulars around Daydream are still unknown and it doesn't help either that ZTE has been tossing around claims of Daydream compatibility for the Axon 7 handset as well.Either way, in its current state, the ZTE VR should be pretty close to its Samsung counterpart in terms of experience, although, perhaps, with even less content to go around.

The reason to can't play blu-ray movies on ZTE VR 

The fact that different blu-ray movies files come with different video and audio codecs, Such as:MKV, MP4, MOV, WMV,AVI, etc. and different formats: Side-By-Side, Anaglyph, Top-Bottom. Since the ZTE VR does’t understand the encoding in the content on blu-ray movies. So you should choose the supported files by ZTE VR. In the picture above, you can conclude blu-ray movies format(with MP4 video and AAC audio codec)that a good choice. Now, you just need a video converter to convert files into blu-ray movies Side-By-Side format with MP4 video and AAC audio codec.

How to Watch Hot 3D Movies on ZTE VR 


Step 1: Import blu-ray movies 

Insert 
blu-ray  movie to disc drive, and click “Load from disc” button to load. For video file, click the “Add video” button, browse to computer hard drive and import video into this app. 


Step 2: Select format and set profile

Tap on “Format” bar and find “3D Video”, there are a lot of format options for you. “MP4 Side-by-Side 3D Video (*.mp4)” is recommended for Samsung ZTE VR.
 

Tip: We recommend using 1280×720 HD resolution to encode your videos. Higher resolutions will not provide any better quality, meaning you’ll waste space and processing power.

We also recommend using a higher bit rate than a typical web stream at that resolution, as the pixels in your video will be magnified on the phone’s screen. The optimal bit rate is content dependent, and many videos can get by with less, but 5 Mb/s should give good quality.

3D movies should be encoded “full side-by-side” with a 1:1 pixel aspect ratio. Content mastered at 1920×1080 compressed side -by- side 3D should be resampled to 1920×540 resolution full side -by -side resolution.

You can click “Settings” near the “Format” to adjust the video resolution and bitrate to get more compatible format with ZTE VR.

Step 3: Convert blu-ray movies to ZTE VR 

Click “conversion” button, video to SBS 3D MP4 conversion begins. When the process finishes, open the output folder to locate. Then transfer them to ZTE VR foo watching via smart phone
 

1. Place your video files into the folder named “My Videos” on your Built-in SD card or extra SD card.

2. On your MicroSD card file directory, navigate to Oculus > Movies > Your Movies

3. Create a new folder within “Your Movies” and label it “3D”

4. Import or move your side-by-side 3D videos into your newly created “3D” folder

Once you have created your 3D content folder and imported compatible video files, insert your MicroSD card into your Galaxy S7/S7 edge, dock the phone in your ZTE VR. Then:

1. Navigate to Oculus Cinema from the main menu
2. Navigate to “My Videos” from the Oculus Cinema content library menu
3. Select the 3D video you wish to view (if you followed the above steps it should have a “3D” label in the upper righthand corner)
4. Choose the cinema mode to begin playback

Related articles 

Thursday, June 30, 2016

Backup blu-ray to Seagate Backup Plus Desktop Drive (5TB)


The process of ripping content from a blu-ray to your Personal Cloud Storage can be quite an easy task. People are ripping blu-ray to Seagate Backup Plus Desktop Drive (5TB) externally to create video on demand, to create a blu-ray collection, to play blu-ray on a plane while travelling, playback blu-ray videos on smart TV/Apple TV, iPhone, iPad, Android smartphones/tablets, or laptops, while preventing you from searching for the blu-ray you want from shelf to watch everytime and keep blu-rays from scratching. Seagate Backup Plus Desktop Drive (5TB) works as a fast portable drive or as a robust mobile media server for you and all you need is an Internet-connected device to browse and seamlessly enjoy blu-ray content stored on Seagate Backup Plus Desktop Drive (5TB). Now start taking the cinema home or on the go! 

In fact, it's easy to backup blu-ray movies to Seagate Backup Plus Desktop Drive (5TB) as long as you got a blu-ray Ripper in hand. There is a number of blu-ray Ripping software available like Freemake to help you convert blu-ray videos if you want to backup blu-rays to Seagate Backup Plus Desktop Drive (5TB) for playback on your portable device. These software programs vary, so you might be confused when you have to choose one. If so, you are recommended to use Pavtube ByteCopy. It's rated as the best solution out there to rip blu-ray movies to Seagate Backup Plus Desktop Drive (5TB).For mac users, here is the Pavtube ByteCopy for Mac version. 

You have a great many choices only depending on what your purpose of using the output video file. 

1. Backup blu-ray to VOB/blu-ray folder: fast speed, original blu-ray quality and structure, convenient for future blu-ray burning; 
2. Convert blu-ray to PC/Mac General Video: diversified choices, different formats for various purposes, smaller file size; 
3. Rip blu-ray to Device Video: Play blu-ray on iPhone/iPad/Android/Apple TV/Surface/TV/other portable devices in mobile way 

Free download and install: 


Other Download: 
- Pavtube old official address: http://www.pavtube.cn/bytecopy/ 
- Cnet Download: http://download.cnet.com/Pavtube-ByteCopy/3000-7970_4-76158512.html 


Backup blu-ray to Seagate Backup Plus Desktop Drive (5TB) 

1. Load blu-ray content 

Insert your blu-ray disc into blu-ray drive, Launch the program and click the "Load file(s)" button to import the blu-ray movies. blu-ray, ISO/IFO files are also supported. You can select chapters as you want. 


2. Choose output format 

Click Format and choose formats video from "Common Video" or "HD Video", which can be recognized by Seagate Backup Plus Desktop Drive well. If you want to copy blu-ray to Seagate Portable Hard Drive for playback on Samsung Galaxy TabPro/S2, Galaxy Note 5, Galaxy S6 Edge+/S6, Microsoft Surface Pro 4/Book, BlackBerry Priv, Xperia Z5, Apple TV, TV, etc. there are optimized presets for these devices. And then click the Browse button to specify an output folder to save the converted files. 


3. Advanced Settings 

With the right settings you can retain the quality of the original blu-ray while also saving space. This is particularly helpful when streaming over your network, depending on your network quality. Simply click Settings bar and you can tweak the settings to your satisfaction and even save it as preset.


Step 4. Start converting blu-ray to Seagate Backup Plus Desktop Drive (5TB) 

Finally, hit the "Start conversion" button at the bottom of the main interface to start the conversion. It will automatically convert blu-ray to Seagate Backup Plus Desktop Drive (5TB) compatible video files with the best quality. Once the conversion is finished, click "Open" to quickly find the converted movies. 


This blu-ray to Seagate ripper is sufficiently powerful to optimize blu-ray to make it perfectly match different uses. It could rip your blu-ray to Seagate Backup Plus Desktop Drive : Central 5TB Personal Cloud Storage compatible H.264 video, MPEG-4, and Motion-JPEG for video, and AAC, MP3, Audible (formats 2, 3, 4), Apple Lossless, AIFF, and WAV for audio with excellent output video quality. You are free to compress a blu-ray to smaller file size and save the space for storage. Best of all, it allows you to copy your blu-ray movies to 5TB with original structure or main movie only. So why not to get the useful software immediately? 

Stream blu-ray from Seagate to Devices from Windows/Mac 

Please follow this procedure to load content onto your Seagate in Windows

1. Set up your Seagate by opening the Public folder and clicking on the "Manage the Seagate Central" link. 

2. Before you decide to transfer a large amount of files to your Seagate, Seagate recommends you make sure you have the most up-to-date firmware. See the instructions at the end of this article on how to check and update firmware. 

3. Open the Start menu, then open (My) Computer or Windows/File Explorer. (In Windows 8: Press the Windows key () + D, then select File Explorer 

4. In the left sidebar, click on the triangle icon next to Network to expand the menu 

5. Find the Seagate and click on it. 

6. The Seagate will appear with the hostname. 
Example: Seagate-123456. The Public folder will appear. You may also see folders with titles that correspond with your username and other users you have set up. If you plan to view your content outside of your home using the Seagate Media app, this content must be placed in the Public folder. 

7. Open another Windows/File Explorer or (My) Computer window and navigate to the files you would like to add to your Seagate. 

8. Select the content you would like to copy and drag and drop the content to the folder of your choice. The private folder's title is your username. That folder will always require a login and should be used to store files you don't want readily available on your local network. You can add files to this folder by double-clicking on the folder and providing your credentials. Once you're logged in, you can manually transfer files to that folder. 

How to verify and update firmware 


To verify whether you have the latest version of the firmware on the Seagate, open the Public folder and click on the "Manage the Seagate Central" link. Once logged in, go to "Settings" and then click on "Advanced" and "Firmware Update". On the right-hand side, click on "Check for update" and apply any updates it may find. 

Please follow this procedure to load content onto your Seagate from a Mac computer: 

1. Set up your Seagate Central by opening the Seagate's Public folder and clicking on the "Manage the Seagate Central" link. 

2. Before you decide to transfer a large amount of files to your Seagate, Seagate recommends you make sure you have the most up-to-date firmware. Check the bottom of this article to see how to verify the firmware on your drive. 

3. Open Finder from the Mac desktop. 

In the left sidebar under Shared, find your Seagate device listed as Seagate-XXXXXX(where Seagate-XXXXXX is the host name). 

4. The public folder will be displayed. You can access it from here if that's where you want to copy your data. If you want to access your private folder, you will need to click on Connect As, then type in your credentials. Note: The username that is displayed by default is not the username of your Seagate. You will need to clear out that username and then type in the username that you gave the drive during setup. 

5. Once you are connected, the private share (titled according to your username) and the public share will display in the left sidebar. Double-click on the desired folder to drag and drop data to it. 

If you would like to view your content while outside of your home through the Seagate Media app, please drag and drop your content to the Public folder. The Seagate Media app has a limitation that will only allow you access to your Public Folder. 

How to verify and apply firmware on the Seagate 

To verify which version of the firmware is on your Seagate, open the Seagate's Public folder and click on the "Manage the Seagate Central" link. Once logged in, click on the "Settings" tab, then click on "Avanced" on the left-hand side of the window. Click on "Firmware Update." Click on "Check for update" on the right-hand side and apply any updates it finds. 

Learn more about Seagate >>>>Seagate / DVD to Seagate 

Related articles

Tuesday, June 28, 2016

Backup “The Secret Life of Pets”: Blu-ray movies for Smart TV Playback


Summary: As the summer heat wave in each cell, you will feel enjoying “The Secret Life of Pets”blu-ray movies on Smart TV programs at home more comfortable that outside. 


TV is important in our daily life no matter for watching blu-ray movies and TV shows on it, or treating it as the display of computer. We also can erjoying the blu-ray movies on it. It brings us a lot of fun to rich our entertainment life. Among many TV brands, Sony, Panasonic are prominent. Their Smart TV, 4K TV and 3D TV are popular on the market. And because each TV has its own the most compatible format, people often encounter the blu-ray movies playback issues for not knowing the limitation.What kind of blu-ray files can I play on my TV? Most movie lovers will have this question. 

So, list the supported format of the main brands of TVs: Sony TV, Panasonic TV, 4K TV, 3D TV, here. And also show how to playback the upcoming blu-ray movies on TV. 


Supported Video and Audio formats by 4K TVs 


Container Extension Container Extension
MPEG1 .mpg, .mpe, .mpeg AVI .avi
MPEG2 .mpg, .mpe, .mts, m2t, ASF .asf, wmv
MP4 .mp4 MKV .mkv
WebM .webm 3GPP 3gp, 3g2
RealMedia .rm, rmbv,rv MOV .mov

Supported Formats for SD card, DLNA and USB by Panasonic TVs 


SD card
DLNA
USB
(Video)
SD-Video files
SD-Video Standard Ver.1.31 Modified date with a PC may not be displayed correctly
AVCHDFiles
AVCHD Standard Ver.2.0(AVCHD 3D , AVCHD Progressive)
Modified date with a PC may not be displayed correctly
MP4 Files
Video codec
H.264, MPEG1, MPEG2
Audio codec
MPEG, MP3, AAC, HE-AAC, AC3, E-AC3
MKV Files
Video codec
H.264, MPEG1, MPEG2
Audio codec
MPEG, MP3, AAC, HE-AAC, AC3
FLV Files
Video codec
H.264
Audio codec
MP3, AAC
3GPP Files
Video codec
H.264
Audio codec
AAC, HE-AAC
PS Files
Video codec
H.264, MPEG1, MPEG2
Audio codec
MPEG, MP3, AAC, HE-AAC, AC3, E-AC3, LPCM
TS Files
Video codec
H.264, MPEG1, MPEG2
Audio codec
MPEG, MP3, AAC, HE-AAC, AC3, E-AC3, DTS core

Supported File Formats for DLNA and USB Compatible Sony TVs


Category
File Type
File Extension
DLNS
USB
Video
MPEG-1 .mpg, .mpe, .mpeg
O
O
MPEG-2 PS .mpg, .mpe, .mpeg
O
O
MPEG-2 TS .mpg, .m2t, .mpe, .mpeg
O
O
AVC(MPEG-4 part 10),MPEG-2TS .m2ts, .mts
O
O
AVC(MPEG-4 part 10) ,MP4 .mp4
O
O
MPFG-4 Visual (MPEG-4 part 2), MP4 .mp4
O
O
DivX SD(Home theater profile 3.0) .divx, .avi
X
X
Xvid .avi
X
X
WMV(9/VC1), Asf .asf, .wmv
O
O
Divx HD .divx, .avi
X
X
OGG .ogv
X
X
3gpp/3gpp2 .3gp, .3g2
X
X
Divx HD plus, MKV .mkv
X
X
RealMedia .rm, .rmvb
X
X
MOV .mov
X
X
FLV .flv
X
X
MVC .mvc
X
X
Music
LPCM .wav
O
O
MPEG-1 Audio Layer-3 .mp3
O
O
WMA(9), Asf .wma
O
O
- .aac
X
X
Image
JPEG .jpg, .mpo
O
O
PNG .png
X
X
RAW(Sony ɑ ) .arw4
O
O

Turn blu-ray movies “The Secret Life of Pets” importing in Smart TV playback 


All charts above are found in the TV’s official site or manual list. So they can been seen as the most compatible format for Sony, LG, Samsung and Panasonic TVs. But for those videos whose formats are not in the list, how can we watch them on the HD, 4K, 3D TV? Maybe you can consider a video converter. Here, I recommend you Pavtube ByteCopy 


Free download and install: 


Other Download: 
- Pavtube old official address: http://www.pavtube.cn/bytecopy/ 
- Cnet Download: http://download.cnet.com/Pavtube-ByteCopy/3000-7970_4-76158512.html


Step 1: Add blu-ray movies to converter 

Install and launch the Video Converter, and then click "Add video" button to import your files to the software. If you wanna combine video clips into one file, you can click the "Merge into one file" box. 


Step 2: Select output format 

Just go to "Format" bar to choose format in "TVs" or "HD Video" column. 


Step 3: Convert blu-ray movies to Smart TV converter 

Click the "Start conversion" button under the preview window, the converter will start encoding MP4 clips for importing to Smart TV. 

Related articles 

Thursday, June 23, 2016

Top 3D Blu-ray Copy Reviews

 
People in the modern world prefer to use blu-ray discs in order to save their important files. Blu-ray Disc won the HD format war finally. They have the potential to save more data and are reliable than DVDs. These unique features have played a major role behind the popularity of blu-ray discs and it can also be considered as an excellent alternative available for usb flash drives. In order to save your data into a blu-ray disc, you need to get hold of a reliable free bluray burner. 


Learn more >>> Top Blu-ray ripping software 


If you already have a Blu-ray player that 3D movies works fine, you don’t need to upgrade. The only features that have been added to Blu-ray players recently, such as screen mirroring and 3D upconversion, are inessential. Your play 3D on TV will already upconvert video as well as any inexpensive player, and there are better ways to get your mobile device’s screen to your TV see 3D movies. 

If you want to add streaming services to blu-ray player, you’re better off getting this one - Pavtube ByteCopy. They support far more blu-ray services, have a better user interface, and are faster to use than other blu-ray player. The features of a Blu-ray player should be considered. 

Free download and install: 
  

Other Download: 
- Pavtube old official address: http://www.pavtube.cn/bytecopy/ 
- Cnet Download: http://download.cnet.com/Pavtube-ByteCopy/3000-7970_4-76158512.html 

The steps to copy Blu-ray 3D movies 

Step 1: Import video. 

Insert your Blu-ray movie to disc drive, and click “Load from disc” button to load Blu-ray from ROM. For video file, click the “Add video” button, browse to computer hard drive and import video into this app. 


Step 2: Select format and set profile. 

Tap on “Format” bar and find “3D Video”, there are a lot of format options for you. “MP4 Side-by-Side 3D Video (*.mp4)” is recommended for blu-ray player 


Tip: We recommend using 1280x720 HD resolution to encode your videos. Higher resolutions will not provide any better quality, meaning you'll waste space and processing power. 

We also recommend using a higher bit rate than a typical web stream at that resolution, as the pixels in your video will be magnified on the phone's screen. The optimal bit rate is content dependent, and many videos can get by with less, but 5 Mb/s should give good quality. 

While H.264 is the recommended video coding, H.265 videos can also be played. 

3D movies should be encoded “full side-by-side” with a 1:1 pixel aspect ratio. Content mastered at 1920x1080 compressed side -by- side 3D should be resampled to 1920x540 resolution full side -by -side resolution.. 

Step 3: Convert 3D Content to SBS 3D MP4. 

Click “Convert” button, video to SBS 3D MP4 conversion begins. When the process finishes, open the output folder to locate. 


For Mac users who wants to convert 3D content to 3D SBS, the equivalent Mac 3D Convertershould be used.

Here is a list of some of the most popular 3D blu-ray copy applications that can be found on the Internet. 


Compairson

Support Blu-ray

Blu-ray Disc
Yes
Yes
Yes
BDMV Folder
Yes
Yes
Yes
Blu-ray ISO
Yes
Yes
Yes
M2TS File
Yes
Yes
Yes

Disabling DRM

Region
Yes
Yes
Yes
AACS
Yes
Yes
Yes
UOP
Yes
Yes
-
DRM
Yes
Yes
-
HDCP
Yes
Yes
Yes
BD+
Yes
Yes
Yes
BD-ROM
Yes
Yes
Yes

Main Features

Full Copy
Yes
Yes
Yes
Directly Copy
Yes
Yes
Yes
Edit
Yes
Yes
-
Reset
Yes
Yes
-
2D/3D-3D
Yes
Yes
Yes
Add Subtitle
Yes
Yes
-
Extract Subtitle
Yes
Yes
-
Forced Subtitle
Yes
Yes
-
GPU Acceleration
Yes
Yes
-

Related articles