iPhone series: iPhone, iPhone 6s Plus, iPhone 6s, iPhone 6 Plus, iPhone 6, iPhone 5c, iPhone 5s
iPad and iPod touch series: iPad Air 2/1, iPad mini 4/3/2/1,
Method 1: Handbrake settings for Rip DVD Optimized Handbrake Presets to Encode Video for iPad/iPad
The abovementioned Handbrake presets are a little out-of-date as it is not prepared for Handbrake iPhone and iPod, the following guide will show you how to convert DVD to iPhone with Handbrake HD DVD to iPhone presets.
Step 1. Hit Win+R after you open HandBrake folder and paste % appdata %\Handbrake. There are two preset files in the folder, namely handbrake_presets.xml and user_presets.xml, containing Handbrake iPhone, iPod touch and Apple TV presets. Right click to open user_presets.xml with notepad.

Step 2. Replace the original content with the tags below, save and close the notepad.
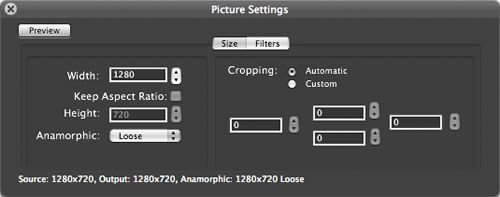
Step 3. Reopen HandBrake, and you'll see the handbrake iPhone preset in its Presets Windows.
Then you can following our Handbrake rip DVD tutorial to import the source DVD movie, select the destination folder to save the output file, choose the created iPhone preset in Handbrake for your output format and commence the DVD to iPhone conversion task with Handbrake.
Tips
1. Handbrake settings for iPhone and iPad using iPod Touch preset
If you want your video to play on all Apple devices, you can use iPod preset. The output file size will be smaller than Apple TV preset, but the picture won't be as good as Apple TV preset. Converting DVD movies and videos to iPad or iPhone SE with iPod touch preset is similar to using Apple TV preset. Just raise the resolution to 480 height and the output video will work on all Apple.
2. Handbrake settings for iPhone or iPad using Apple TV preset
iPad, iPhone SE and Apple TV can handle higher resolution, so use Apple TV preset if you want to make the most of your HD feature and watch HD videos on your iPad or iPhone SE.
1.Import DVD or Video to Handbrake
2.Select Apple TV preset
If you want to rip commercial DVDs, Blu-ray DVD movies excluded, the Apple TV preset is fine. If you need to convert HD videos, you can raise the resolution to 1280 width in picture settings.
Method 2: Customize Optimized iPhone Presets in Handbrake to Rip DVD to iPhone/iPad/iPad
Step 1: Install the optimized iPhone presets in Handbrake
At the very beginning, you need to download the presets. Then run Handbrake, go to "Presets" -> "Options" at the lower right side of the interface and click "Import" to select the preset files you just downloaded and unzipped.
Then three iPad and iPhone presets will appear in the Handbrake presets panel for you to choose.
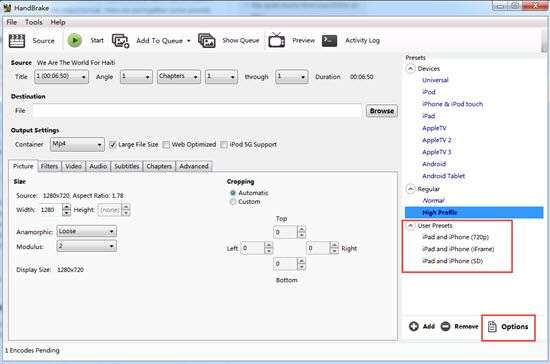
Step 2: Choose Collect Handbrake Preset for iPhone/iPad
1. In case you want a higher-quality file or put the movies or videos on your TV, it's recommended to choose the 1080p preset.
2.For the standard definition video while ripping a DVD using Handbrake, the SD preset is all what you need
3.The iFrame preset will allow you to create a file that is almost 960*540, which is half resolution of 1080p and is favored for promoting HD content; It is as close as you'll get full resolution on your iPhone SE and your iPad. Good option to save space when you watch videos mainly on iPad.
Tips: The customized Handbrake iPhone presets are only suitable for the iPhone SE and iPod. For the iPhone 6S/iPhone 6/Plus or iPad Air, please move to the Part 2.
Method 3: Best Handbrake Alternative to Rip DVD to iPhone without Presetting Beforehand
Handbrake settings are pretty much confusing and tricky for many users, not to mention the best settings in Handbrake. A once-and-for-all solution to tackle these issues is to find a Handbrake alternative, that not only save your time in finding the best Handbrake settings for DVD rips and your devices, but also rip any encrypted DVD to your devices without any error. Pavtube ByteCopy for Mac - The best Handbrake Alternative to Rip DVD to iPhone without Presetting Beforehand recommend to you.
Full-featured handbrake alternative provides you the best way to ripping any latest copy-protected DVDs with 1:1 image quality including X-project DRM, CSS encrypted DVDs, Sony ARccOS protected DVDs and all region 1-6 commercial DVDs. Furthermore, it supports the newest devices including iPad Air, iPad Mini 2, iPhone 6/6 Plus/SE, Samsung Galaxy S7 /edge Surface Pro 3, WP8, PS4 and more. 6X faster speed and no quality
Free download and install:


Other Download:
- Pavtube old official address: http://www.pavtube.cn/bytecopy-mac/
- Cnet Download: http://download.cnet.com/Pavtube-ByteCopy/3000-7970_4-76177783.html
step 1. Step 1. Load DVD disc
Insert DVD movie into disc drive, click the "Load Disc" button, and load source DVD disc from disc drive. Or import DVD ISO image, DVD folder, and DVD IFO from computer hard drive to Pavtube ByteCopy for Mac.
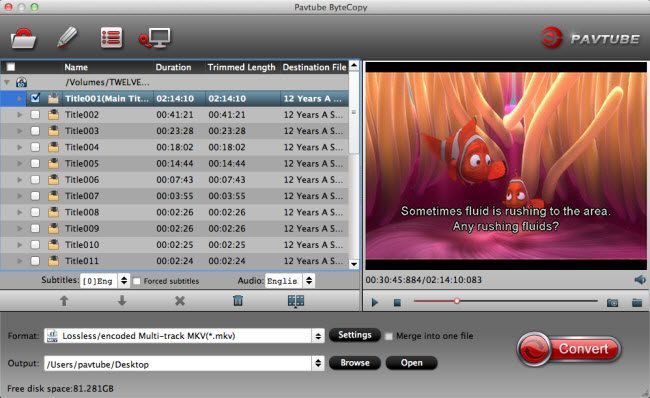
step 2. Step 2. Choose output format
Choose "Lossless/encoded MP4, MOV, AVI, MKV, WMV, etc " from "Format" drop-down list as output format.
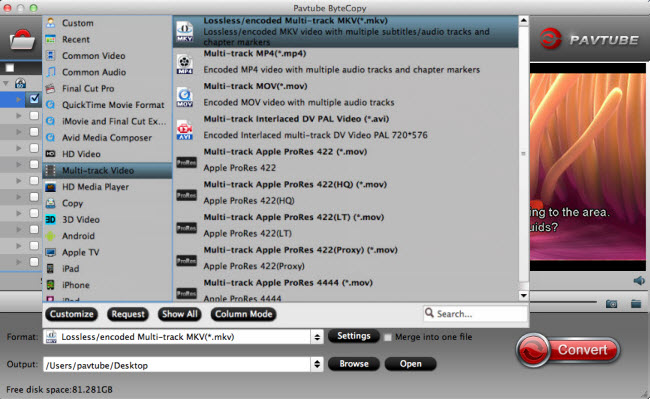
step 3. Step 3. Adjust profile presets (optional)
Enter "Settings" option to adjust profile presets. Remove unwanted audio tracks and subtitles from saved DVD file.
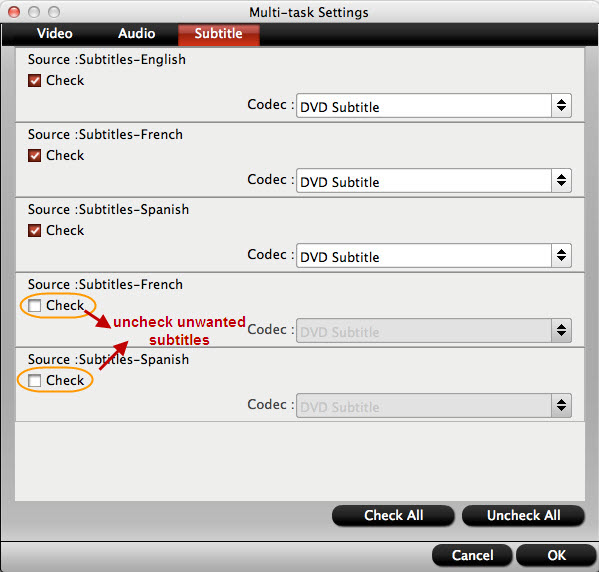
Step 4. Blu-ray DVD Backup
Hit the "Convert" button on ByteCopy main interface to start rip DVD to with high quality and fast speed.
At the end of the day, DVD rippers are applications that set your movies from discs and allow you to have digital copies of the content that you’ve paid for. And please keep in mind, only personal usage of the DVD rips is legal.
Related articles
- 2016 Best 3 DVD Ripping Software
- Rip 2D/3D Blu-ray to 3D MP4/MKV for TV for streaming
- Get Multi-track Blu-ray/DVD Ripper
- Put DVDs to Synology DS416slim NAS
- Backup DVD to QNAP TBS-453A M.2 SSD-based NASbook
No comments:
Post a Comment