
If you happen to have a pile of Blu-ray collections at hand, you want to copy them into jRiver Media Center 21/20 with DTS/5.1 for better streaming or viewing. So you should ripping the Blu-rays to a digital video format supported by jRiver Media Center.
At First, to riping Blu-ray movies to jRiver Media Center 21/20 with DTS/5.1 quickly and easily, you'd better rip the Blu-ray contents off of the Blu-ray disc and convert them to a digital video format supported by jRiver Media Center.
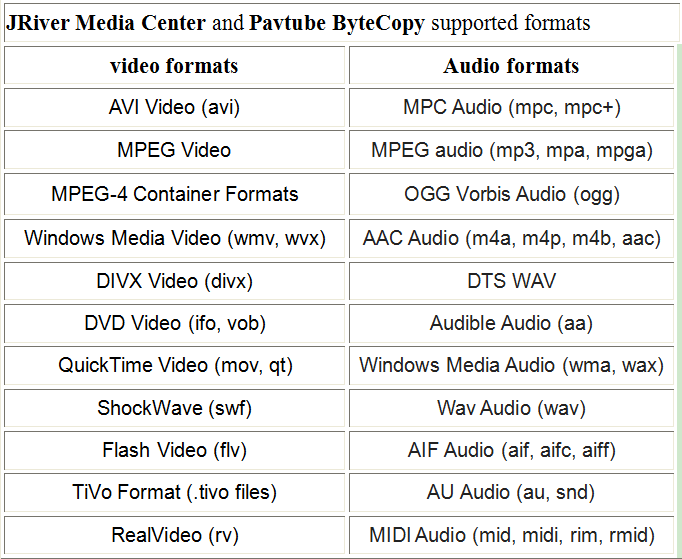
The video and audio formats
In this way , the highly recommended to take advantage of Pavtube ByteCopy, which is specially designed to remove any encryptions on Blu-ray discs, including region codes, etc then convert Blu-ray to a digital version format with fast ripping speed and excellent output quality, so that you can play on jRiver Media Center 21/20 with DTS/5.1 or stream from jRiver Media Center 21/20 with DTS/5.1 to Server Clients or DLNA compatible devices such as PC, Smart TVs, Blu-ray players, receivers, game consoles, etc.
Free download and install:


Other Download:
- Pavtube old official address: http://www.pavtube.cn/bytecopy/
- Cnet Download: http://download.cnet.com/Pavtube-ByteCopy/3000-7970_4-76158512.html
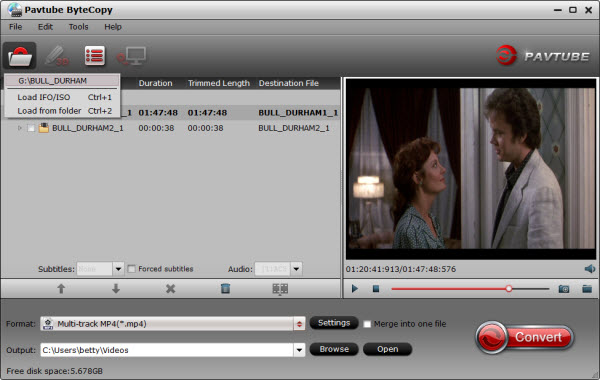
Step 1: Load Blu-ray disc.
Insert Blu-ray disc into an internal or external Blu-ray drive. Launch ByteCopy, click "File" > "Load Disc" button to browse to disc drive and import source movie into this app.
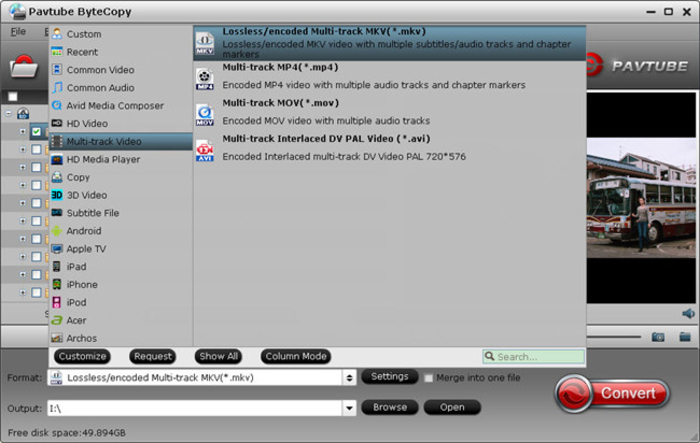
Step 2. Specify output format
Click Format (located below where the Blu-ray's files are displayed). to choose any one according to the supported video format of JRiver Media Center.
Step 3. Start ripping Blu-ray movies
After above settings, click the big Convert button to start to convert Blu-rays. As soon as the conversion is done, simply click Completed to back to main interface.
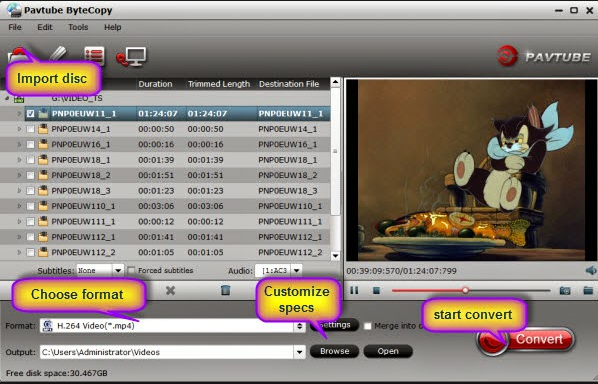
Click Open button to find generated videos. You can transfer them your an external hard drive and add them to JRiver Media Center for playback.
Key Features
Excellent Multi-track Preservation
1. Lossless Blu-rays ripping
Easily get a complete file out of original Blu-rays source and desired audio streams and subtitle tracks are preserved with almost same HD quality.
2. Support Blu-rays to multi-track MP4, MOV and interlaced AVI
Besides MKV, you are able to create MP4, MOV and AVI files that include more than one audio stream to meet the requirements for more media players, mobile devices, etc.
3. Save Blu-rays to H.265/HEVC MP4 with better video quality
In its latest release, ByteCopy adds H.265/HEVC as output format so you would create a MP4 file with better movie enjoyment on your multimedia player.
Powerful DIY Function
1. Export SRT Subtitles
Unique feature to perfectly create a single .srt subtitle file with chosen subtitle track from original movie.
2. Built-in Video Editor
Various video editing functions are available in this app to assist you with creating personal movies with customized adjustments. It allows you to trim, crop, split, merge, insert subtitles, add video effects, adjust volume, etc.
3. Desired subtitles/audio tracks selection
Free to choose wanted language and subtitle tracks from source Blu-ray and DVD movies for better movie enjoyment.
Import Blu-rays files to JRiver Media Center 21/20 with DTS/5.1
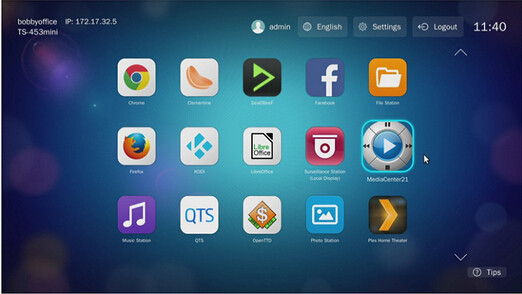
1.Open HD Station and run JRiver Media Center.
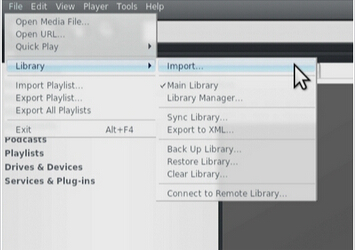
2.Go to “File” > “Library” > “Import”.
Import a single folder: Add the content of generated videos to your library.
3.Choose the folder and the file type you want to import The default folder path is “File System” > “Share” > “Multimedia”.
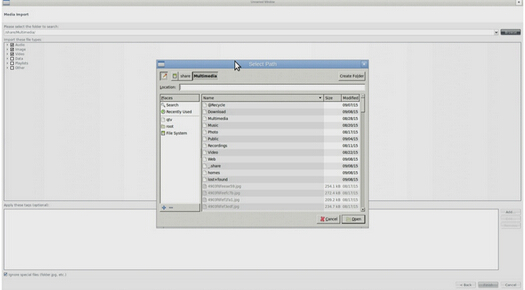
4.Select “Audio”, “Images” and “Video” in the left bar to see the imported files.

When the process is done, you will be able to watch your the Blu-rays movies onjRiver Media Center 21/20 with DTS/5.1 with perfect image and sound quality.
Related articles
- 2016 Best 3 DVD Ripping Software
- Backup Blu-ray to QNAP TBS-453A M.2 SSD-based NASbook
- 3D Blu-ray to 3D AVI on Mac
- Playing blu-ray movies on Vizio Smart TV via USB
- Backup and Put Blu-rays to Synology DS416slim NAS on Mac
No comments:
Post a Comment